The Candlewood Project was an exciting adventure in which we took on a troubled and neglected house, and with time and tons of energy we turned into a pretty cool home to live in.
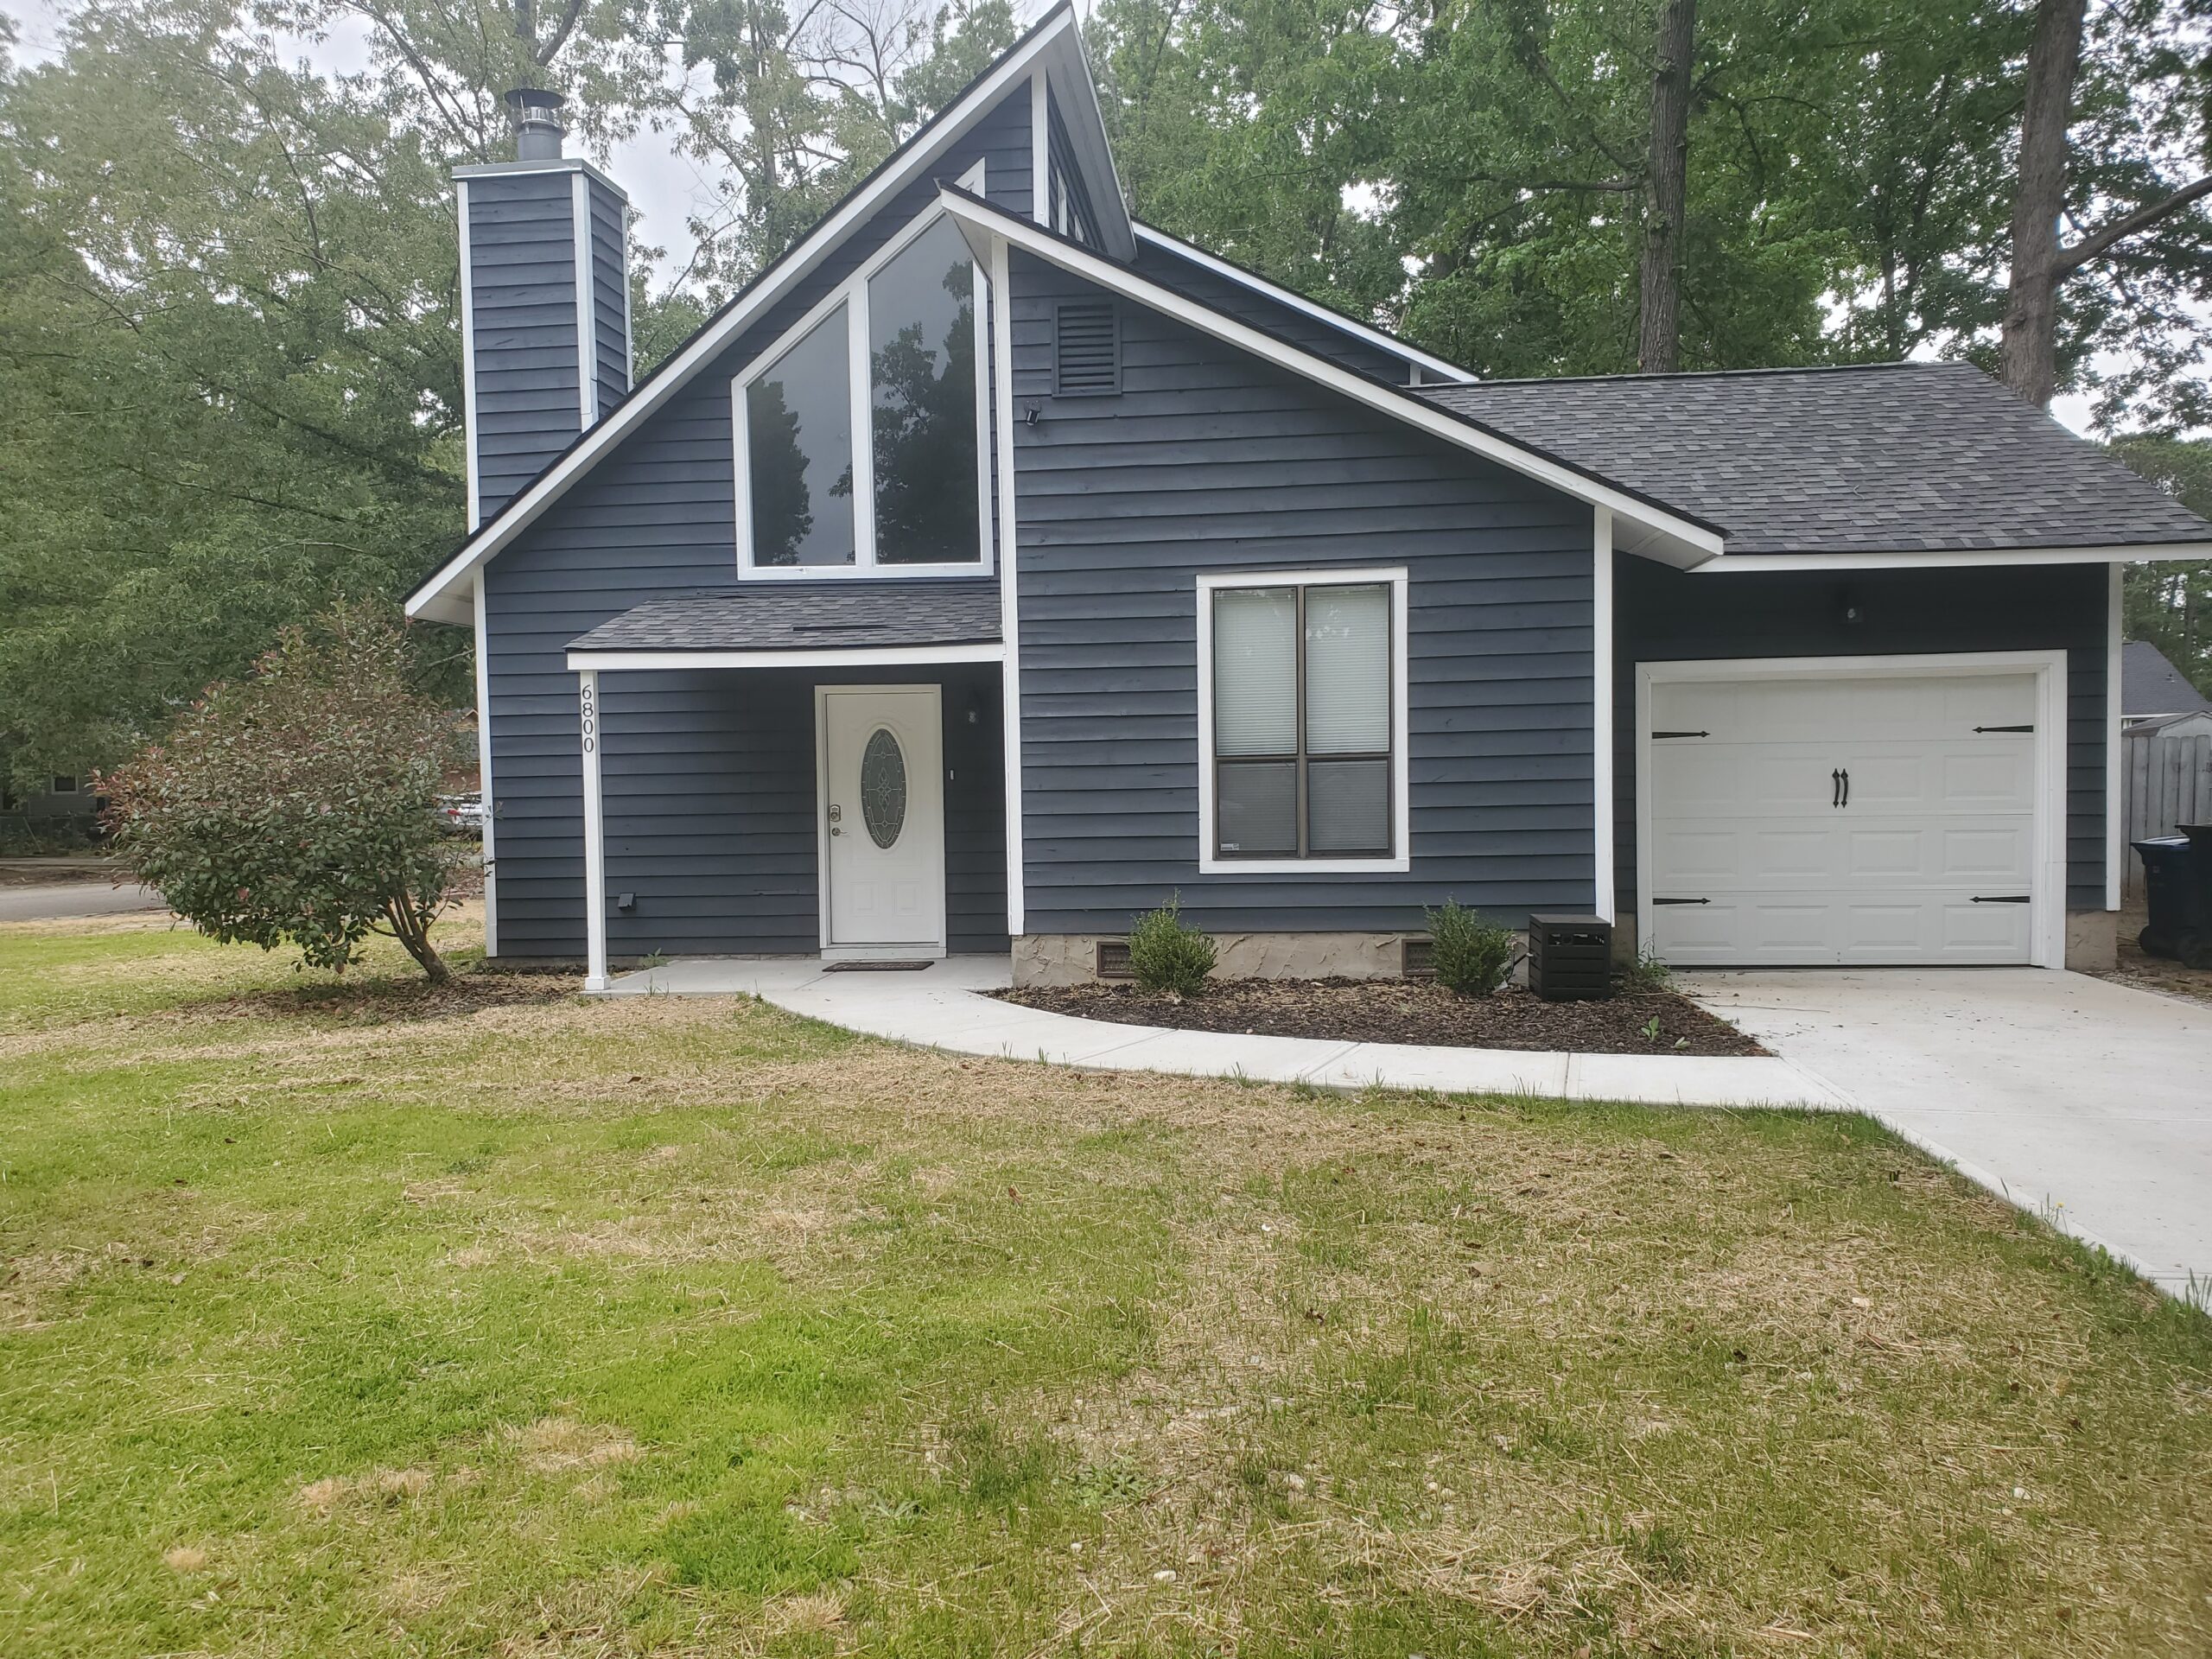
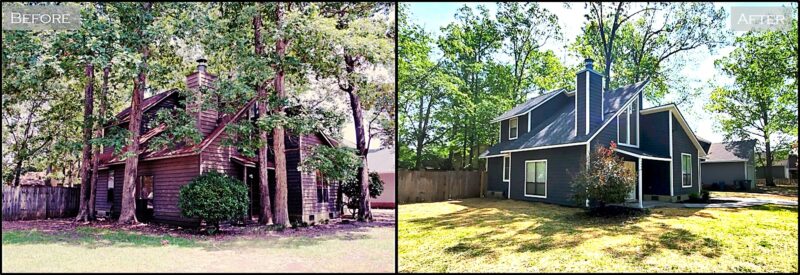
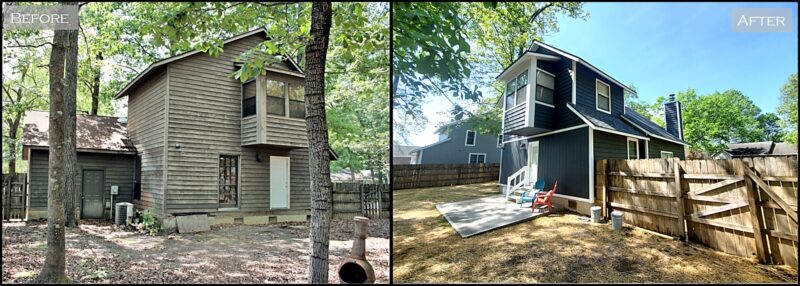
Front Exterior: Starting with the exterior, we first identified the hazard of 5 rather large Oak trees residing nearly on top of the house…they had to go! Next we new the roof was either the original or well overdue for a replacement…thanks to a great local Sandhills NC crew – 3 Bros Roofing – it was done in a day and looks great. Next we had a deteriorated driveway, sidewalk and need for front and rear patios…bring on the concrete!
The next much needed item was just general improvements of doors, windows, and cedar board/trim replacements. Originally there were two bedrooms with exterior doors and now stairs/porch. We then had an exposed crawlspace with a random board covering the entrance. We closed off the doors, and put in one exterior door off the new hallway. We add the concrete patio and slab in front of the crawlspace to reduce water and debris from pooling near the house. We chose Hardy panel over replacement cedar due to the price difference and provide a change in the overall appearance. During the process we improved the light fixtures and added a security camera for the back yard. Currently, we have a plan to do exterior paint in the spring, but overall the exterior is sealed up and ready to go!
Living Room: For the living room, we removed the carpet and replaced it with Luxury Vinyl Planks (LVP). The faux double front door was replaced with a single front door with an oval window cutout. After those major improvements, we updated light fixtures and applied fresh coats of paint to the fire place, built-ins, walls, ceiling, and trim.
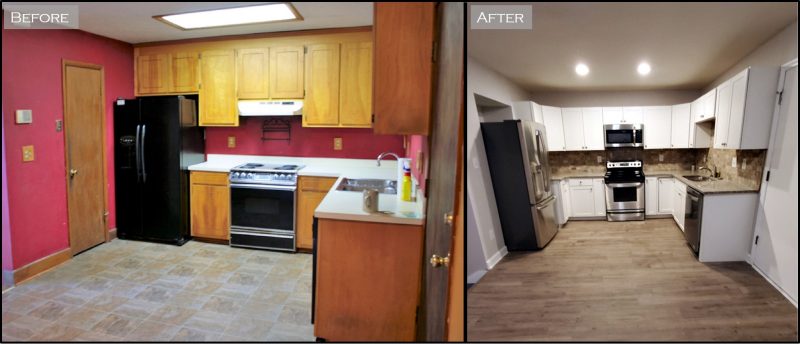
Kitchen: Everything in the original kitchen needed a good update, whether its the appliances, the cabinets, flooring, or paint. Naturally, we were up to the task. Additionally we added an over-the-range microwave, moved the refrigerator in order to create some much need cabinet space. We added a backsplash to tie it altogether.
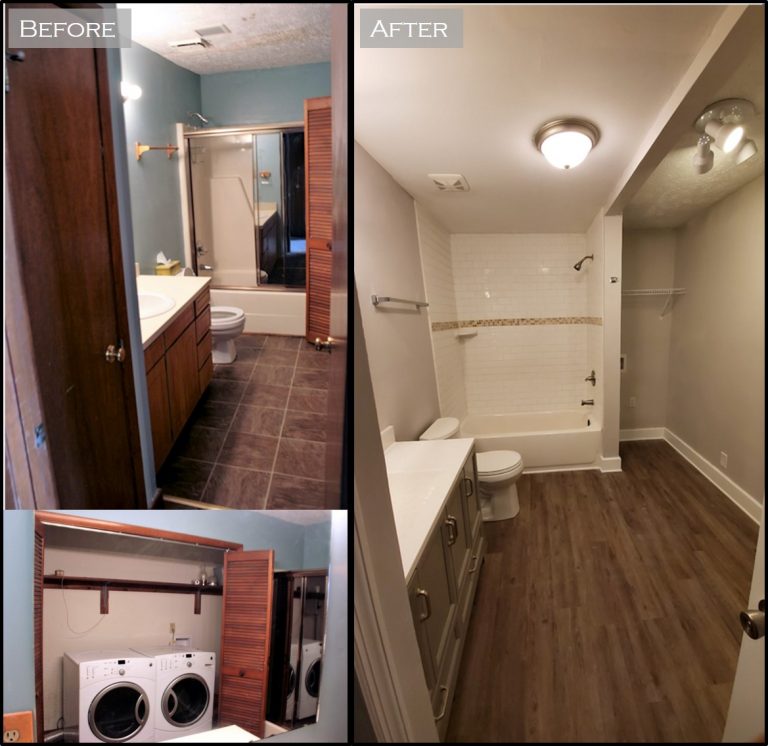
First Floor Bathroom: The downstairs bathroom proved to be the biggest challenge of this project. Due to significant water damage we gutted the bathroom, replaced floor joists as needed, replaced CPVC plumbing with PEX tubing, moved the electric Hot Water Tank to the garage, replaced sub-floor, and gave the heart of the house a much needed face lift. Now, the once outdated and impractical bathroom/laundry room is ready for a small family.
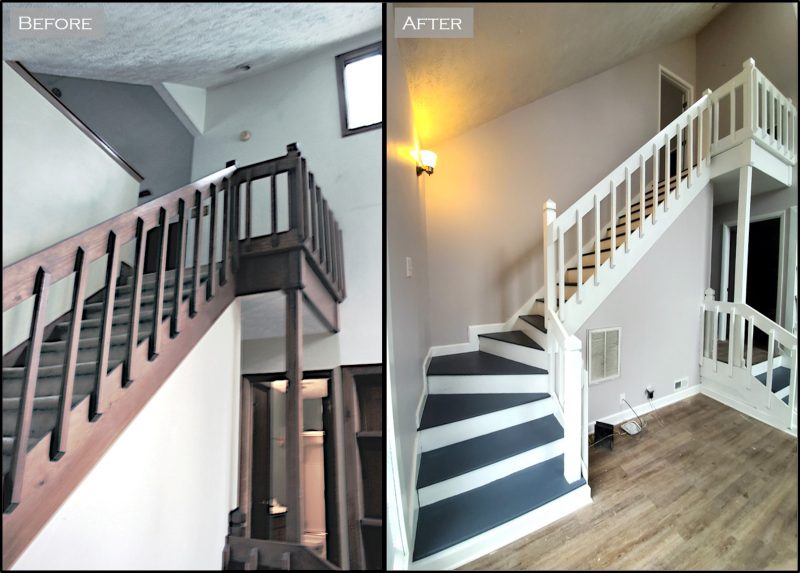
Staircase and Loft Improvements: The original master suite loft concept seemed outdated and lacked significant privacy for any prospective tenant. We closed off the room, removed the carpet on the stairs, and put a fresh coat of paint on the staircase.
Living Room: The very first room in the house and it was perhaps one of the more dismal and depressing rooms. With the enhancement of the hallway to the rear exterior, the overall flow of the house through the living room makes for an exciting and practical living space for any family. We focused on new flooring, paint, fixtures, and necessary repairs. Not pictured is the built-in shelving that shares a wall with the kitchen. The living room has two accent walls with an actual wood fireplace and the built-in shelving.

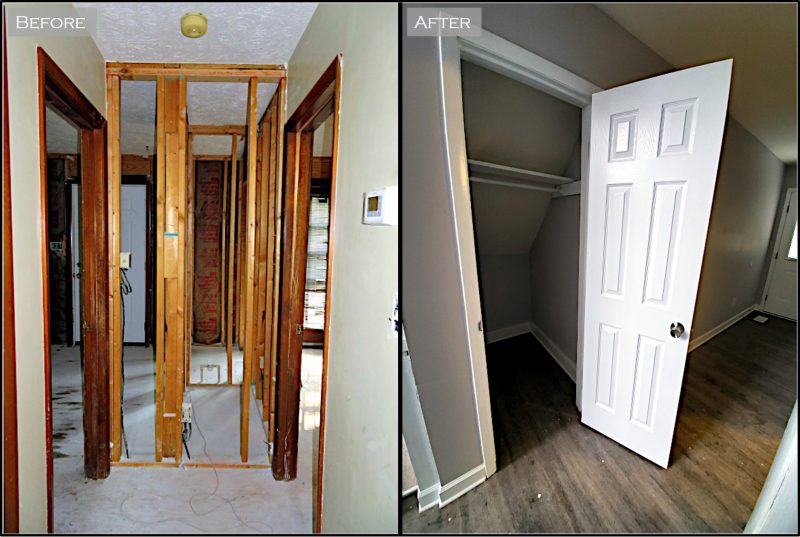
Hallway Addition: This house required you to walk through either of the two first floor bedrooms in order to access the backyard from the living room. We moved the main water shut off to a convenient spot along the wall and reframed a hallway with a single exit to the back yard. We later closed off the original exterior doors and insured both bedrooms had closets built. The location where the hallway is now was once utilized by two adjacent closets for the first floor bedrooms.
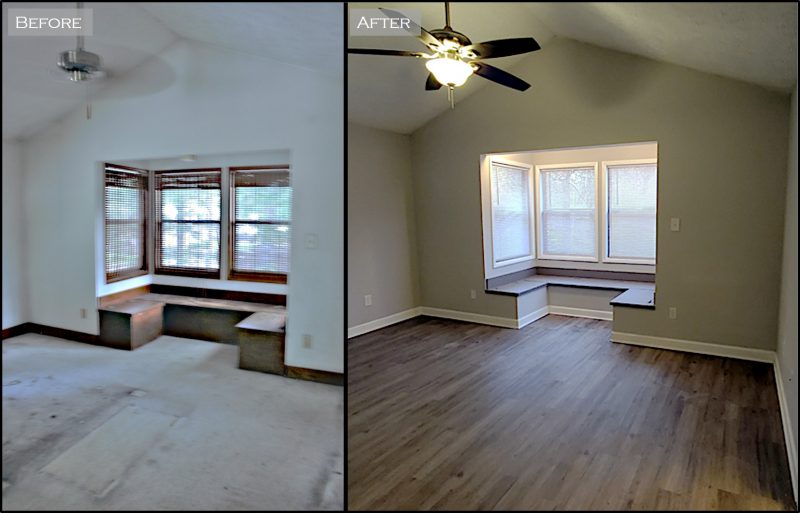
Master Suite: The Master Suite has ample space for bedroom with a nook area. Additionally there is a walk-in closet and a full bathroom. For the bedroom area we closed off the loft and gave the room a much needed makeover.
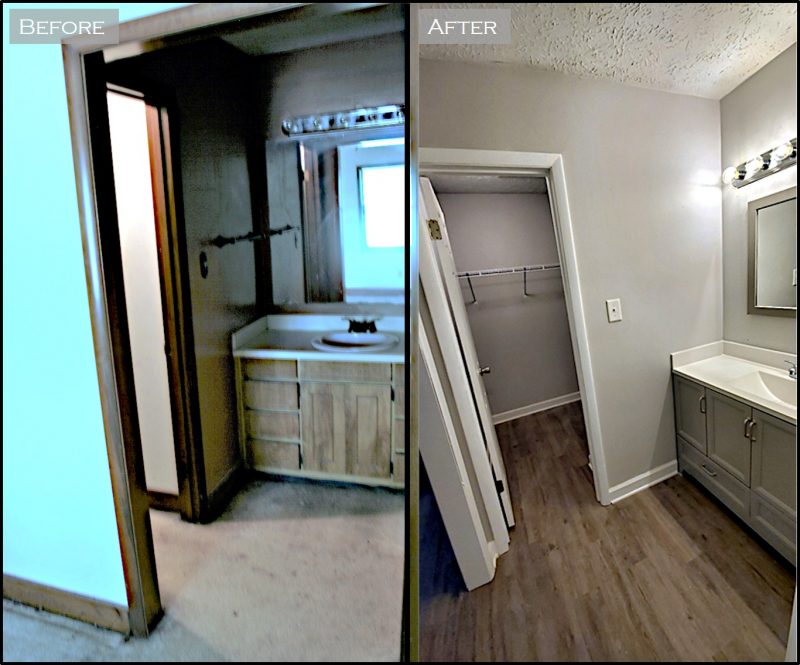
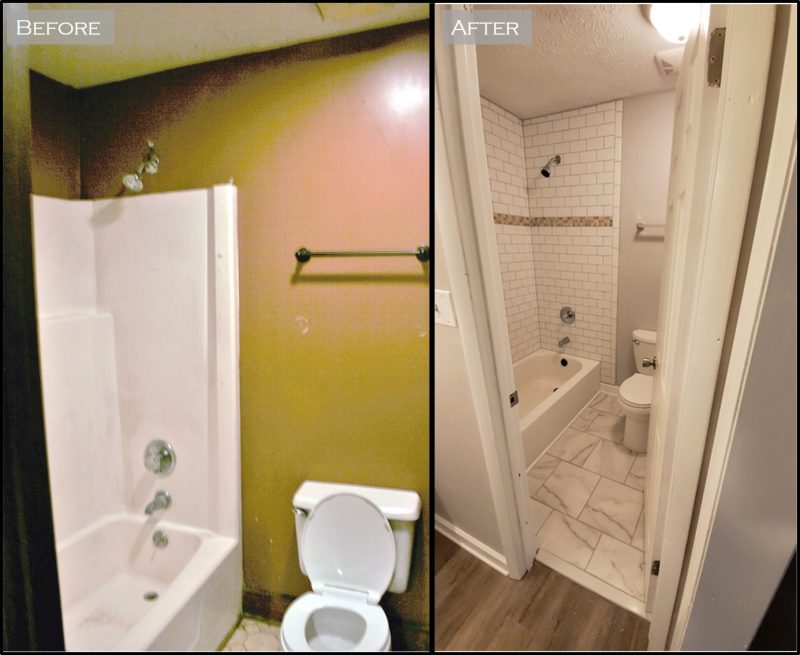
Master Bathroom: The Walk-In Closet and Vanity received much needed improvements. The original drab wooden shelf/wire shelf combination in the walk-in made the closet feel dark and cold. One would argue that is the case for the entire house and the master bathroom was no exception. In fact, the master bathroom was by far the most miserable room in the house. It suffered from water damage issues and required a full makeover. Now the entire space feels lighter and more inviting.
This project was our first true test in planning, purchasing, and executing the remodel of a single-family home. We spent long hours working the project, reaching out to various contractors for bids/quotes, and insuring we made the most out of our limited budget. In the end we experienced our share of ups and down, whether it was the unforeseen issues or expenses or the fact our timeline was not what we originally planned.
We enjoyed the journey. We encourage others to do the same. We wanted to test ourselves and gain some experience. I would say we certainly accomplished just that. This project is a wrap minus a fresh exterior paint job in the spring time. Now it’s just waiting for someone to call it home!
