Candlewood Pre-Foreclosure

The Candlewood Project was an exciting adventure in which we took on a troubled and neglected house, and with time and tons of energy we turned into a pretty cool home to live in.  

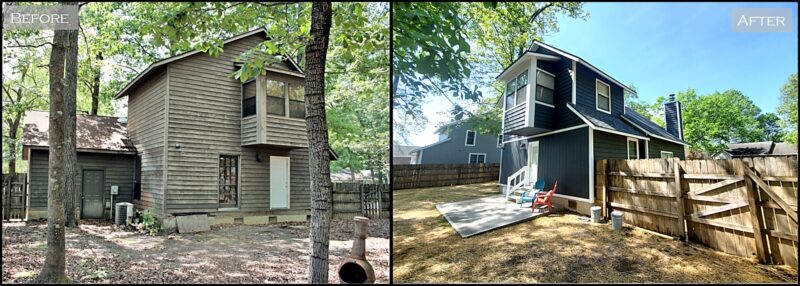
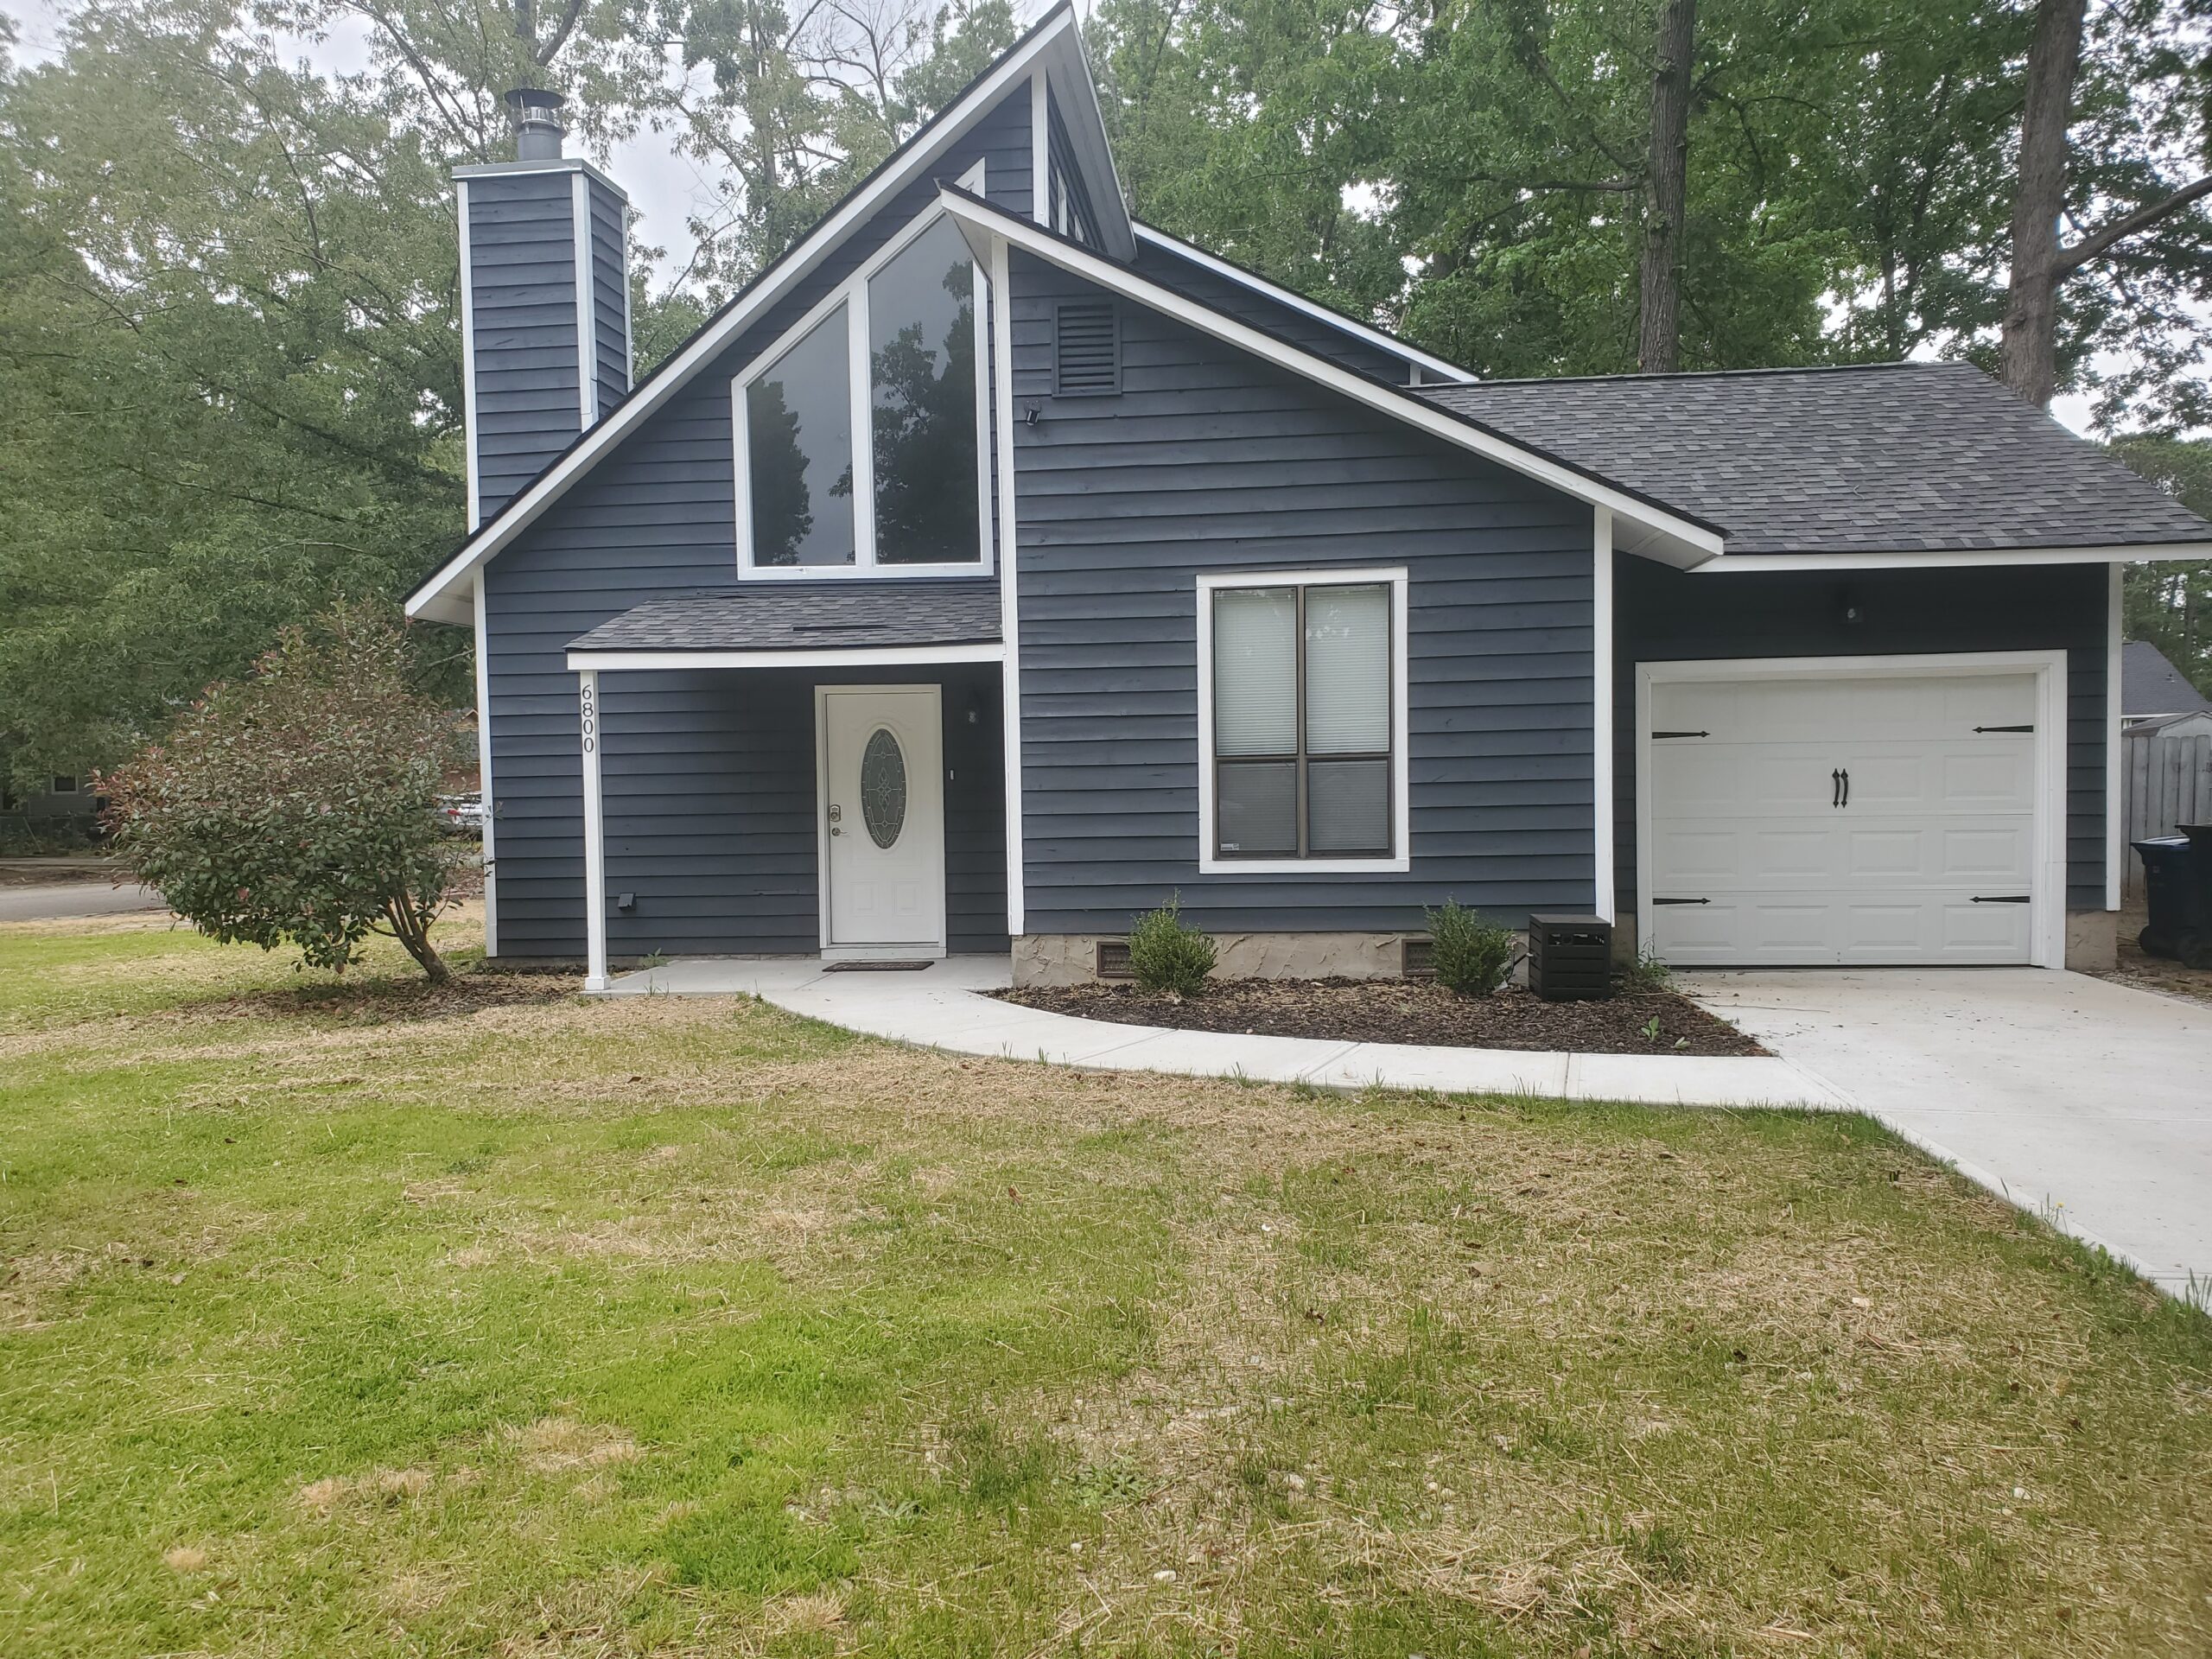
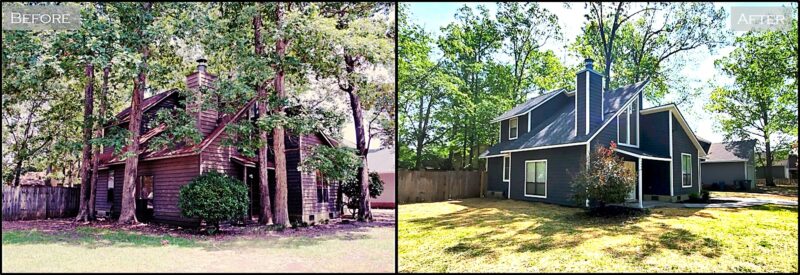
Front Exterior: Starting with the exterior, we first identified the hazard of 5 rather large Oak trees residing nearly on top of the house…they had to go!  Next we new the roof was either the original or well overdue for a replacement…thanks to a great local Sandhills NC crew – 3 Bros Roofing – it was done in a day and looks great.  Next we had a deteriorated driveway, sidewalk and need for front and rear patios…bring on the concrete! 

Front Exterior

The next much needed item was just general improvements of doors, windows, and cedar board/trim replacements. Originally there were two bedrooms with exterior doors and now stairs/porch. We then had an exposed crawlspace with a random board covering the entrance. We closed off the doors, and put in one exterior door off the new hallway. We add the concrete patio and slab in front of the crawlspace to reduce water and debris from pooling near the house. We chose Hardy panel over replacement cedar due to the price difference and provide a change in the overall appearance. During the process we improved the light fixtures and added a security camera for the back yard. Currently, we have a plan to do exterior paint in the spring, but overall the exterior is sealed up and ready to go!

CandlewoodRearExt
Rear Exterior

Living Room: For the living room, we removed the carpet and replaced it with Luxury Vinyl Planks (LVP). The faux double front door was replaced with a single front door with an oval window cutout. After those major improvements, we updated light fixtures and applied fresh coats of paint to the fire place, built-ins, walls, ceiling, and trim.

Before and After
Living Room

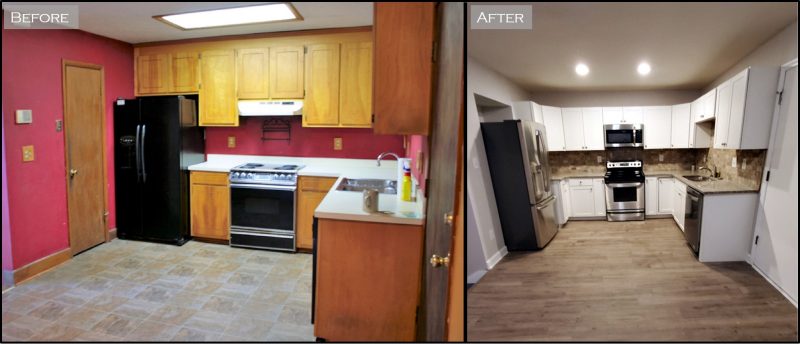
Kitchen: Everything in the original kitchen needed a good update, whether its the appliances, the cabinets, flooring, or paint. Naturally, we were up to the task. Additionally we added an over-the-range microwave, moved the refrigerator in order to create some much need cabinet space. We added a backsplash to tie it altogether.

Before and After
Kitchen

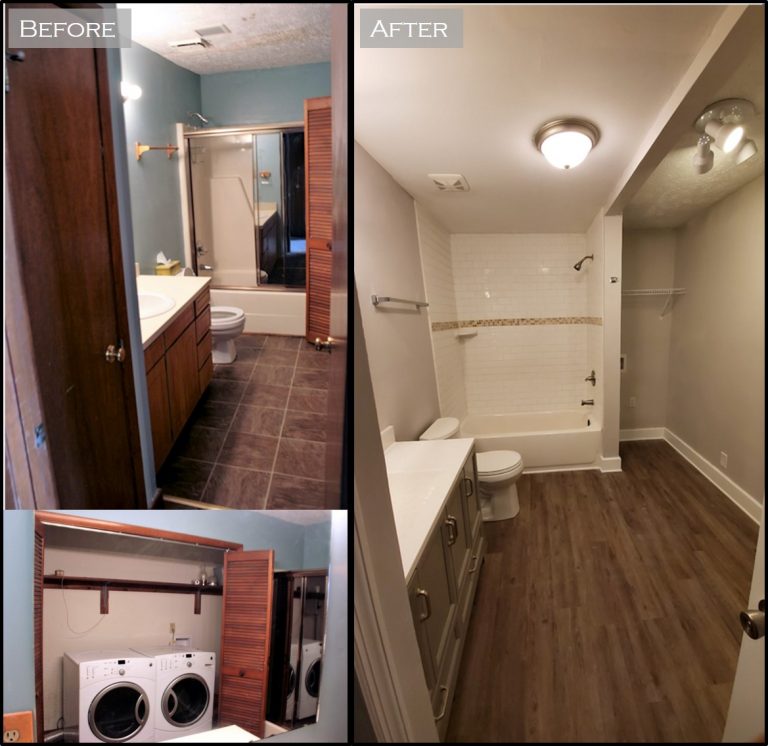
First Floor Bathroom: The downstairs bathroom proved to be the biggest challenge of this project. Due to significant water damage we gutted the bathroom, replaced floor joists as needed, replaced CPVC plumbing with PEX tubing, moved the electric Hot Water Tank to the garage, replaced sub-floor, and gave the heart of the house a much needed face lift. Now, the once outdated and impractical bathroom/laundry room is ready for a small family.

Before and After
Downstairs Bathroom

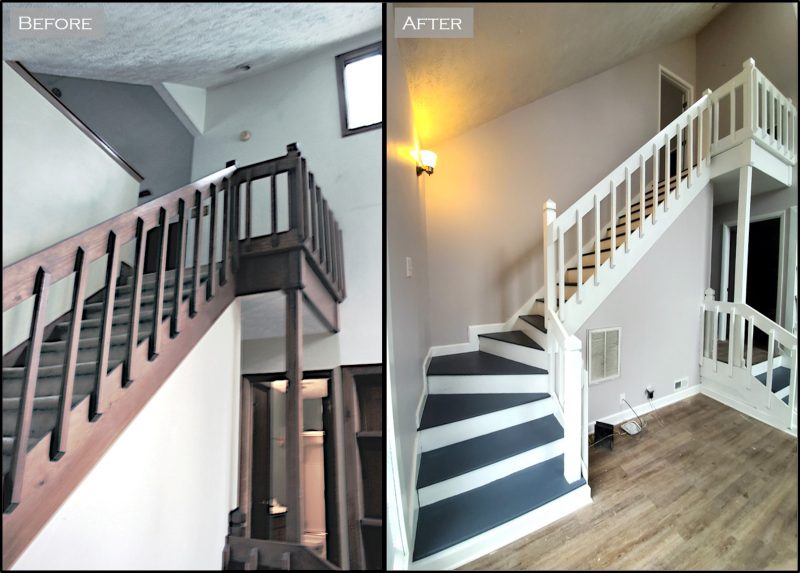
Staircase and Loft Improvements: The original master suite loft concept seemed outdated and lacked significant privacy for any prospective tenant. We closed off the room, removed the carpet on the stairs, and put a fresh coat of paint on the staircase.

Before and After
Staircase

Living Room: The very first room in the house and it was perhaps one of the more dismal and depressing rooms. With the enhancement of the hallway to the rear exterior, the overall flow of the house through the living room makes for an exciting and practical living space for any family. We focused on new flooring, paint, fixtures, and necessary repairs. Not pictured is the built-in shelving that shares a wall with the kitchen. The living room has two accent walls with an actual wood fireplace and the built-in shelving.

Before and After
Living Room

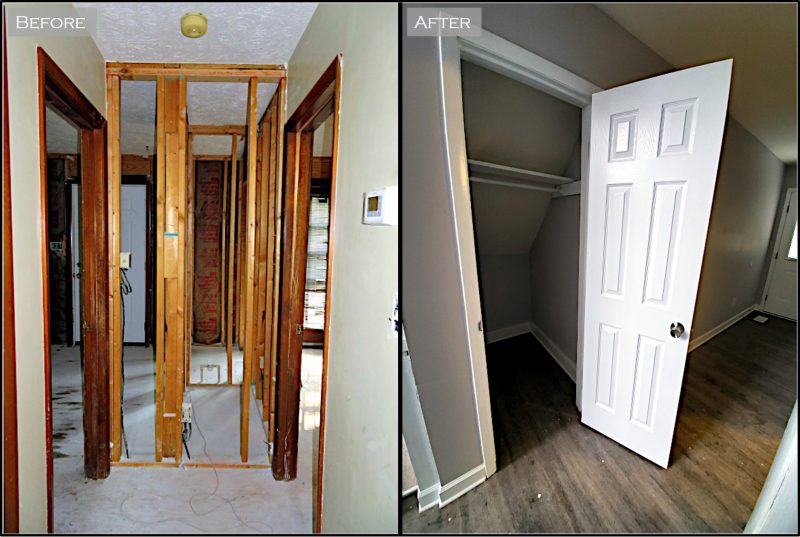
Hallway Addition: This house required you to walk through either of the two first floor bedrooms in order to access the backyard from the living room. We moved the main water shut off to a convenient spot along the wall and reframed a hallway with a single exit to the back yard. We later closed off the original exterior doors and insured both bedrooms had closets built. The location where the hallway is now was once utilized by two adjacent closets for the first floor bedrooms.

Before and After
Hallway

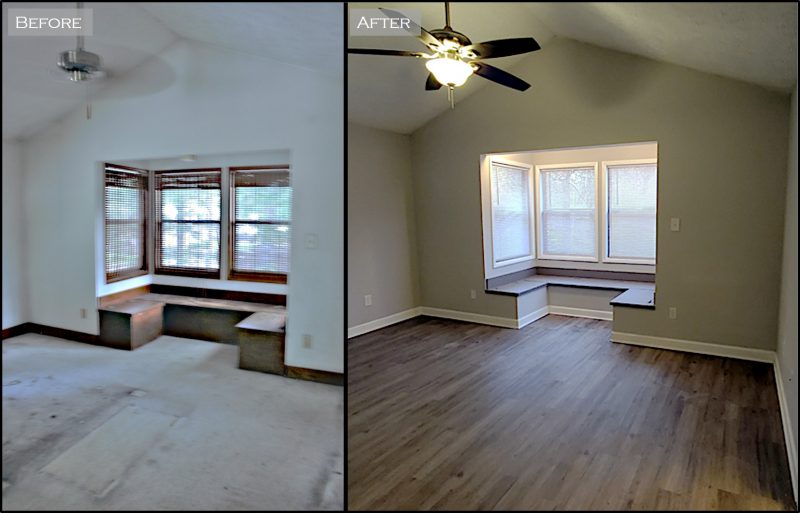
Master Suite: The Master Suite has ample space for bedroom with a nook area. Additionally there is a walk-in closet and a full bathroom. For the bedroom area we closed off the loft and gave the room a much needed makeover.

Before and After
Upstairs Master Suite

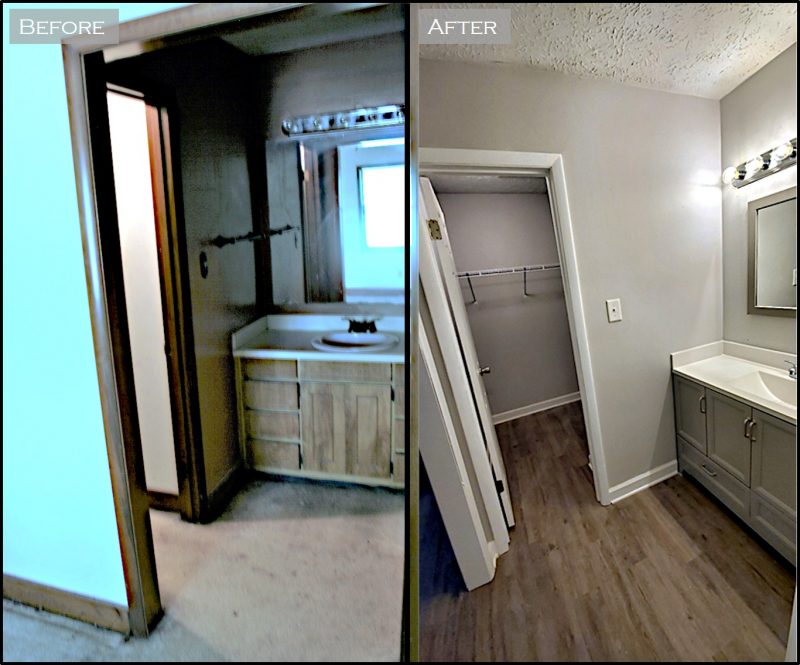
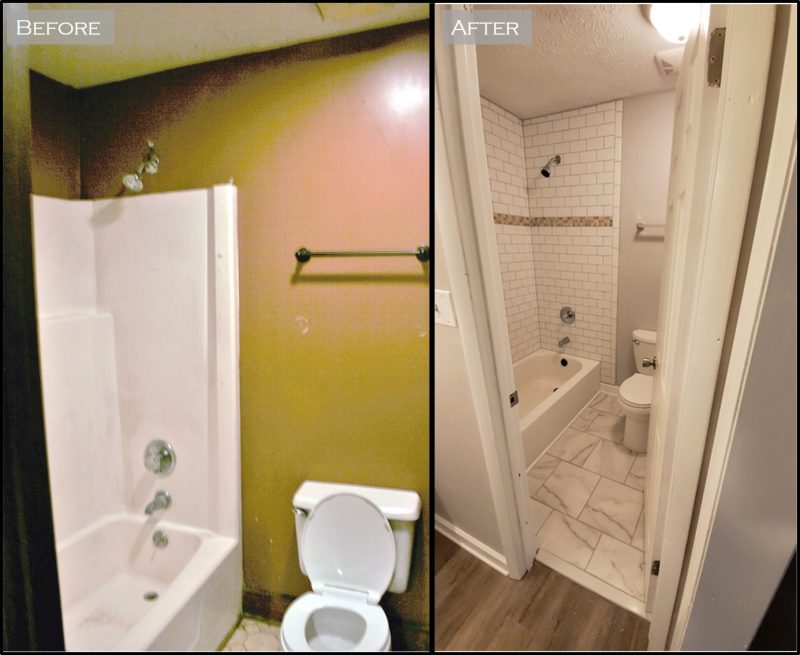
Master Bathroom: The Walk-In Closet and Vanity received much needed improvements. The original drab wooden shelf/wire shelf combination in the walk-in made the closet feel dark and cold. One would argue that is the case for the entire house and the master bathroom was no exception. In fact, the master bathroom was by far the most miserable room in the house. It suffered from water damage issues and required a full makeover. Now the entire space feels lighter and more inviting.

Before and After
Upstairs Bathroom
Before and After
Upstairs Bathroom

This project was our first true test in planning, purchasing, and executing the remodel of a single-family home. We spent long hours working the project, reaching out to various contractors for bids/quotes, and insuring we made the most out of our limited budget. In the end we experienced our share of ups and down, whether it was the unforeseen issues or expenses or the fact our timeline was not what we originally planned.

We enjoyed the journey. We encourage others to do the same. We wanted to test ourselves and gain some experience. I would say we certainly accomplished just that. This project is a wrap minus a fresh exterior paint job in the spring time. Now it’s just waiting for someone to call it home!
Pre-Foreclosures and What to Know

[jetpack_subscription_form show_only_email_and_button=”true” custom_background_button_color=”undefined” custom_text_button_color=”undefined” submit_button_text=”Subscribe” submit_button_classes=”undefined” show_subscribers_total=”false” ]

Are you tired of chasing properties on the MLS and not getting your offers accepted?  We were too and finally our first off-market opportunity showed up on our laps.  It showed up in the form of a pre-foreclosure from a divorced couple that were desperate to save their credit.  My broker approached us after two other offers we placed on houses fell through due to being outbid in a highly competitive market.

The broker represented the seller and of course represents me.  He walked the property and already knew how I analyze properties due to the countless hours we spent looking for good deals.  He undersold the property as requiring simple cosmetic improvements, a new roof, garage door, and some other improvements.  As with anything, I valued his opinion, but knew my experience in construction is more vast than his.  Ideally, I wanted to conduct a property inspection first, but we were racing the clock…in this case…the foreclosure date.

Banks and Foreclosures.  The bank told the listing broker that the property must be under contract by 1 July or it would be sold at auction on the Courthouse steps.  We later learned the seller didn’t communicate clear enough with their broker, because the bank never received the purchase agreement, loan payoff amount request, or communicated the closing date to the bank.  This mishap almost proved costly in closing the deal because it forced us to close on 1 July.

The Loan That Never Was.  Originally, we tried to get conventional agency financing with a 20% down payment which requires an appraisal and significant amount in closing costs that includes:  lawyer fees, title searches, appraisal costs, loan origination fees, penalties for low finance amounts, etc.  For the agreed upon purchase amount of $78K, this amount would equal about $6K with a total cost of $84K.  We knew this amount with the CAPEX (Capital Expenditures or initial repairs) would force us to leave money in the property after a cash-out refinance, but we were confident with the ability of renting the property at our target amount of $1K for the 3 bedroom/2 bathroom house.  We had to pay for the appraisal in advance and the report was to be completed by 21 June with a 1 July closing.  The lender didn’t receive the report until the morning of 28 June…exactly 3 calendar days prior to closing.  As we waited, the lender and broker grew worried and reached out for an extension with the bank.  This is when we learned the bank DIDN’T know the property was under contract and required 72 hours to produce the loan payoff amount.  Additionally, NC law requires a 72 hour period for the lender to show the seller the Closing Disclosures (CD) prior to closing.  At this point we busted these time windows and we began scrambling for an all cash deal as part of the back-up plan…in the event the bank didn’t agree to the extension.  Shortly after I would learn none of that mattered.  The LATE appraisal report came back with a low appraisal value and conditions that I was well aware of with a rating of C5 that my lender would affectionately refer to as the equivalent of being hit by a hurricane.  Basically, the lender could NOT finance the property.  Instantly, we switched gears to an all-cash deal.

Show Me the Money.  While we waited for conventional financing to be approved, we were forced to leave money in separate accounts since we were looking at personal financing due to the loan amount being less than $75K, but more than $50K (Commercial Loan minimums are $75K).  So now we had money in personal accounts as well as in the business account.  On closing day, the sellers signed their documents with no issues and provided the little they could afford.  Now it’s our turn, payment options include certified check(s) or wire transfers.  Due to the previously stated issues, we went with the wire transfer.  While all of this transpired, my broker and I were nervous, because the bank communicated the money had to transfer and deed had to be registered with the county or they would place the property under foreclosure.  We successfully transferred the money, but with only an hour for registering the deed.  Thankfully, the Real Estate Attorney communicated with the bank attorney that all funds are present, documents are signed, and submitted for writing at the courthouse.  As of the next morning, we were listed as the new owners of our very first rental property.

Summary.  We learned so much during this period and here it is.

  • Plan for Contingencies (Financing, Inspections, Timelines)
  • Constant Communication with Your Team – Broker, Lender, Contractor
  • Get Construction Estimates Early and Often
  • Be Prepared for the Worst
  • Be Prepared to Walk Away

We knew this property would be a challenge especially after the initial inspection and the list of items that needed fixed.  We established a hard cutoff for maintenance at $40K.  We knew anything over this amount would require too long to pull our money out.  Remember, we plan to Buy, Rehab, Rent, and Hold for 10 years.  This is concrete for us and has proven to be our backbone in all of our decision making.  Additionally, through tons of prep work and communication with others we placed ourselves in a situation that allowed us to use all cash as a contingency.  IF this is not available to you, just get more creative, be proactive because hard money and other lending is available.